This section explains how to publish the code of a project developed using Laravel Sail to GitHub.
In the process, I will also show you how to use VS Code to manage the Git of your project.
“I want to publish my Laravel Sail project on GitHub.”
“I want to Git manage my Laravel project on VS Code.”
I hope this will be helpful to those who are interested in this topic.
Note that I verified this using the latest version of Laravel 11 project in a Windows 11 environment.
What you need
The following tools and others will be used
If you do not have it on hand, please install it beforehand.
- Visual Studio Code
- Git Bash (Windows users only; Mac users can use Terminal)
- Project created with Laravel Sail
- GitHub Account
The following Japanese article describes how to build an environment in Laravel Sail.

Create a repository on GitHub
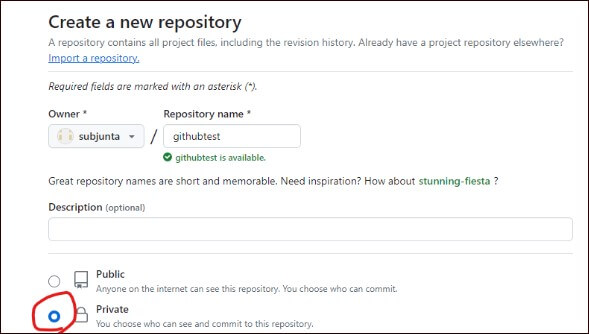
First, create a new repository on GitHub.
After logging in to GitHub, select [New repository] from the pull-down menu in the upper right corner to create a new repository.

Give a name to the repository you have created, and choose whether it is public or private. In this case, set it to private so that it will not be made public.
Other parts of this article will be left as defaults. Save the repository.
Public and Private Key CreationC
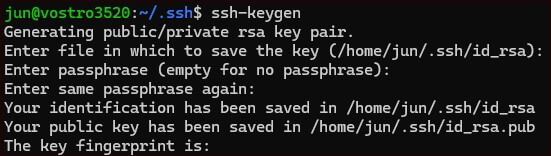
Create the public and private keys in the virtual environment. First, start Ubuntu.
In your home directory, execute the following command, which will create a .ssh directory directly under your home/user name.
|
1 |
mkdir .ssh |
Go to .ssh directory.
|
1 |
cd .ssh |
Execute a command to create a key.
|
1 |
ssh-keygen |
You will be asked for a key name. In this case, we will use the default name “id_rsa”, so simply press the Enter key as is.
After that, you will be asked to enter a passphrase, but if this is also unnecessary, press Enter to proceed. After creation, check if the key has been created.
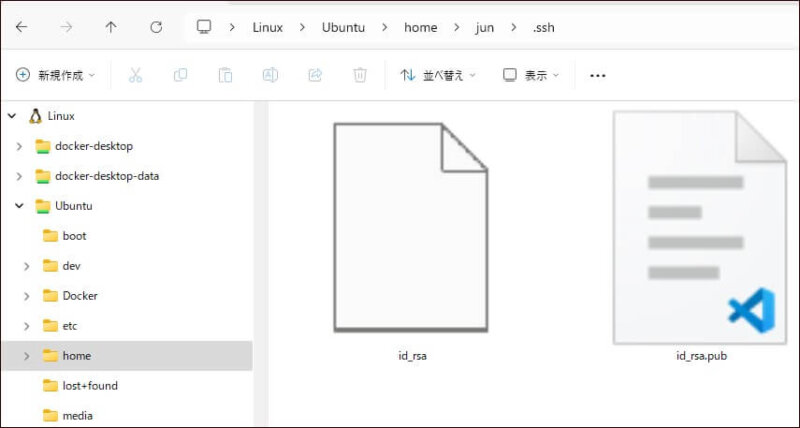
Check the directory and see if the key is there.
Public Key Registration
Open the created public key (id_rsa.pub) with VS Code or similar tool, and copy its contents.
Open your GitHub account settings. Click on your avatar in the upper right corner to open the Settings menu.
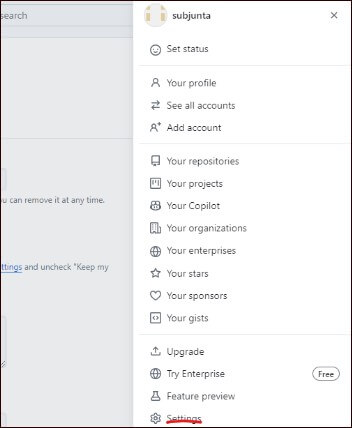
Click the 【New SSH key】 button in the SSH and GPG keys menu.
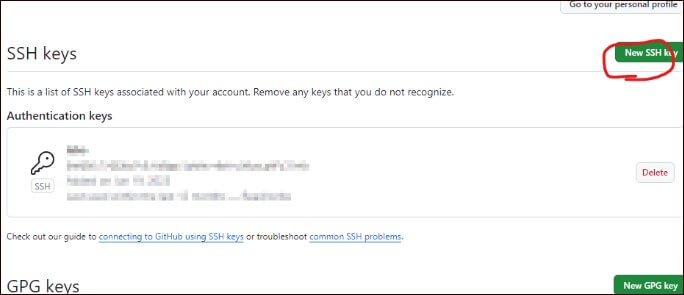
Enter the information about the SSH key. title is [github] in this case.
The title may be a good name to identify the destination to be accessed using this key. For example, [main_pc]
Please change this area to your liking.
Paste the public key code you just copied into key. Click [Add SSH Key].
Git manage projects
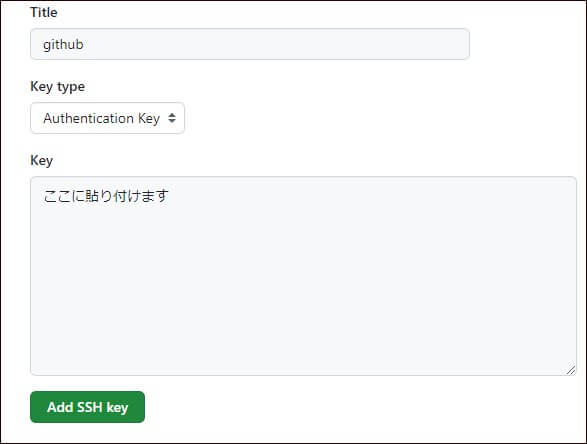
Open VS Code. Click on the third icon from the top in the sidebar.
Click [ Initialize Repositoriy] to create a Git repository. This will, project under Git tracking so that you can keep track of file changes.
If you look in the project after execution, you will see that a new .git directory has been created.
This command has the same function as the git init command. If the button does not appear or something else does not work, you can run the command.
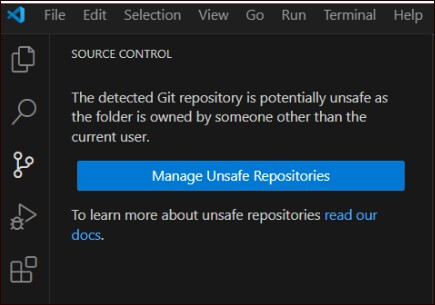
If the Manage Unsafe Repositories button appears
You may see 【 Manage Unsafe Repositories】 for the first time only. If so, click 【Manage Unsafe Repositories】 and follow the instructions to log in to GitHub and select your project.
Initial configuration of Git
Execute the following in the terminal of VS Code to check for the presence of the Global configuration file.
|
1 |
git config --global --list |
Set up the GitHub name and email, respectively, if they do not already exist.
To do so, execute the following commands in order.
|
1 |
git config --global user.name githubユーザー名 |
|
1 |
git config --global user.email githubメールアドレス |
SSH connection test
Next, test the SSH connection to GitHub using the private key. Execute the following command
|
1 |
ssh -T git@github.com |
After execution, you will be asked “Are you sure you want to continue connecting (yes/no/ [fingerprint])?” Type “yes”.
If the message “You’ve successfully authenticated” appears, you have successfully connected.

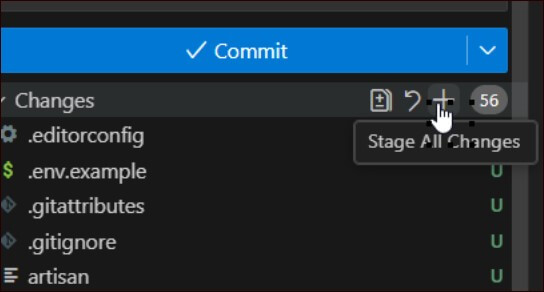
Staging
On VS Code, click the third button from the top on the left sidebar. Click the + button below the [Commit] button. This will make them all eligible for staging.
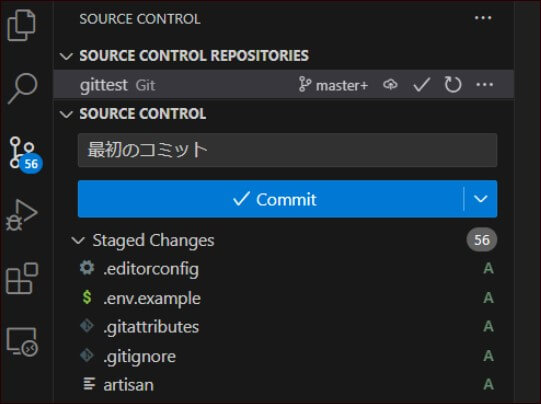
Commit
To finalize the changes in your local environment, do a commit: on VS Code, click the third button from the top on the left sidebar. Click [Commit].
Register Remote Repository
Next, push is performed. Push allows you to publish your project to GitHub. Before pushing, register the remote repository to be pushed.
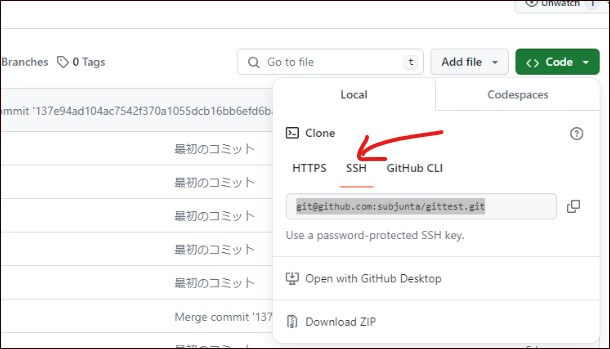
(1) Copy SSH URL
First, login to GitHub and copy the SSH URL of the repository.
Remote Repository Registration
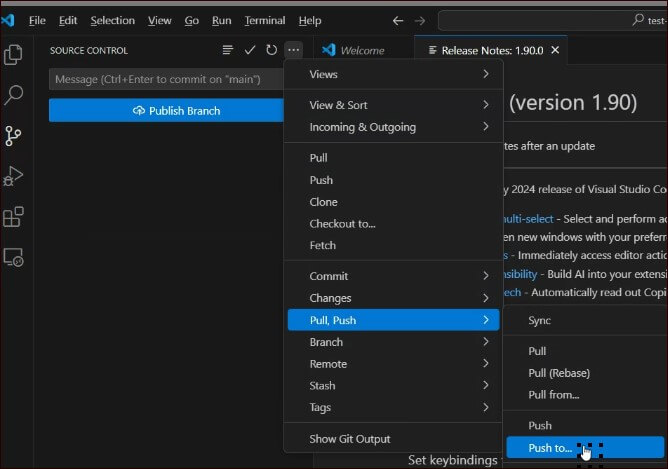
On VS Code, click on the third button from the top on the left sidebar. As shown in the figure below, click […]and select Pull,Push/Push to.
The first time, you will see “Your repository has no remotes configured to push to” in the lower right corner.
Click the [Add Remote] button.

At the top of the project, you will see “Provide repository URL.” Paste the URL you copied in step (1).
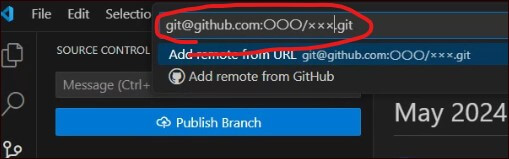
Press Enter and you will see “Please provide a remote name”.Enter the name of the repository on Github, etc., and press the Enter key.
Push
You are now ready to go. Execute the push. Again on VS Code, click on the third button from the top on the left sidebar. As shown in the figure below, click […]. and select Pull,Push/Push to.
Select the destination to push to and press Enter.
You are now done. Check GitHub to see if your changes have been reflected.
After this, you can simply stage, commit, and push when changes are made.
Useful Tool
For a visual view of Git management, we recommend the GitGraph extension, which can be easily installed as a VS Code extension.
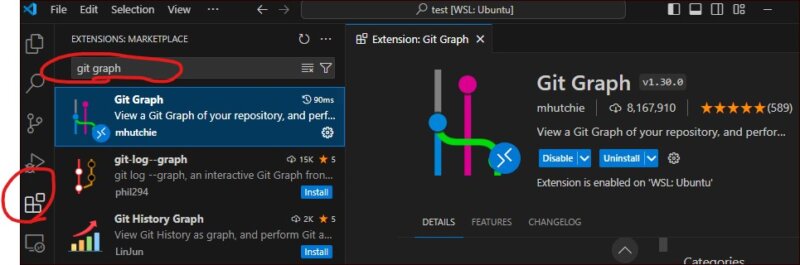
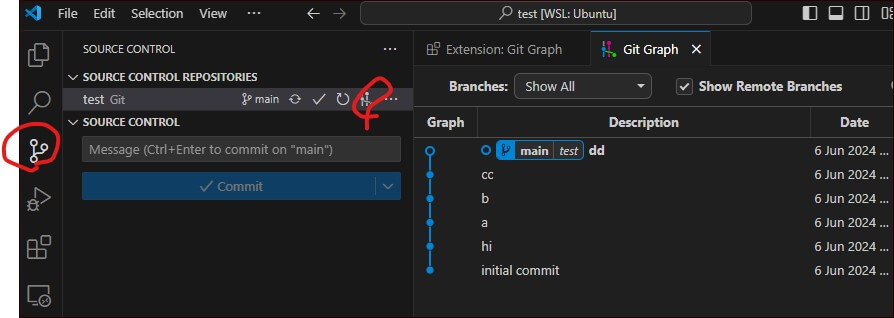
After installation, click the button below to display the management screen with Git Graph. You can see a list of your commit history and other information, which is easy to understand.
If you have used SourceTree before, you will feel “similar!” I am sure you can feel the similarity. It is easier to use SourceTree when you can see it visually.
in the end
Again, I started to write the article lightly and realized that there were many steps to be taken. And it turned out to be a long article^^;
I would be happy if you found it helpful.
If you feel that you did not understand the process of Git management, please refer to this Japanese article.