書籍「Laravelの教科書」Laravel13対応サポートガイド公開中 → ダウンロードはこちら

ChatGPT APIを使ってLaravelと連携:Webアプリを作成する方法を解説

ChatGPT

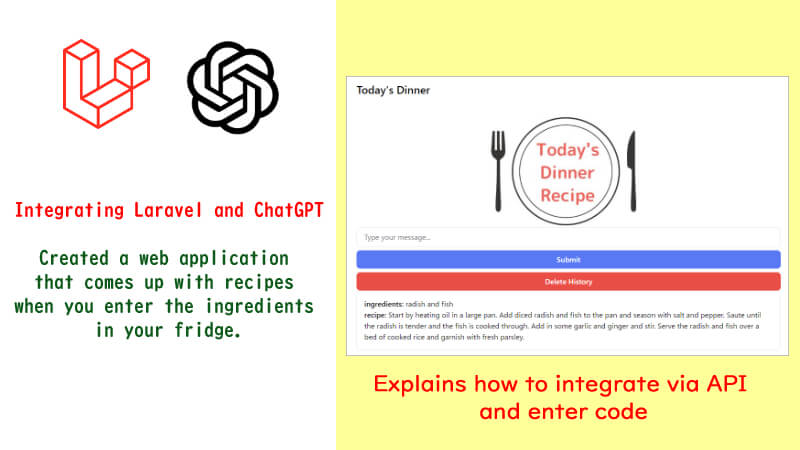
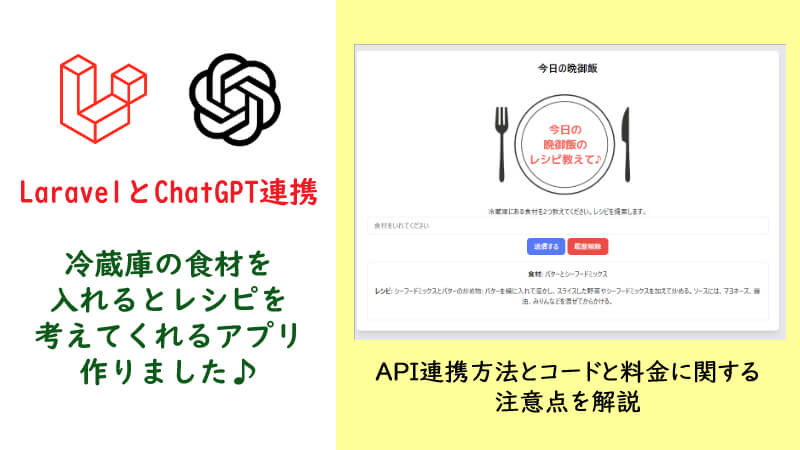
ChatGPTのAPIを使ってLaravelで「食材を入力するとレシピを考えてくれる」Webアプリを作りました。

APIを使ったChatGPTとLaravelとの連携方法とコードの組み方、API利用料についての注意点をご紹介します。

なおWebアプリは、下記動画でどんなふうに使えるかがご覧いただけます。

冷蔵庫にあるもので何を作るか悩んだ時に使えるWebアプリです。

クリックして、どんなふうに動くか見てみてください。

【Webアプリを動画で見てみる】

↓↓↓

ChatGPT APIを使ってLaravelでWebアプリを作成:APIキー設定

まずは連携方法について。今回は、Laravelの公式記事でも紹介されている openai-phpライブラリを作わせてもらいました。
上記のライブラリのインストールには、PHP8.1以上が必要となります。

なお、Laravelはバージョン10を使いました。Laravel10も、PHP8.1以上が必要です。Laravelのインストールは割愛しますが、ご興味あれば、下記記事ご覧ください。

① ライブラリをインストール

コマンドを実行し、ライブラリをインストールします。

composer require openai-php/laravel

設定ファイルを発行します。

php artisan vendor:publish --provider="OpenAI\Laravel\ServiceProvider"

② APIキーを設定

あらかじめこちらのページより、アカウントを作成しておきます。ログイン後、右上のView API Keysをクリック。
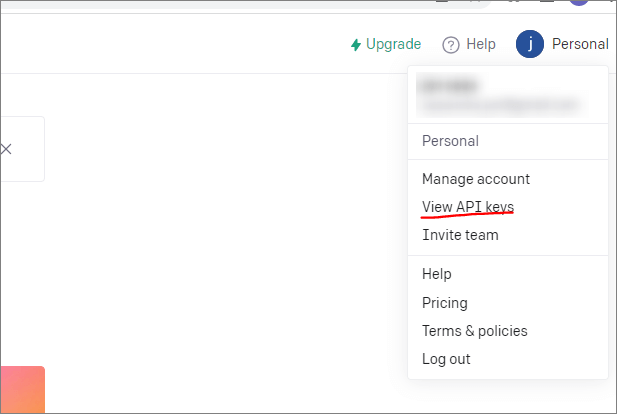
+Create new secret key ボタンをクリックして、APIキーを作ります。キーをコピーします。
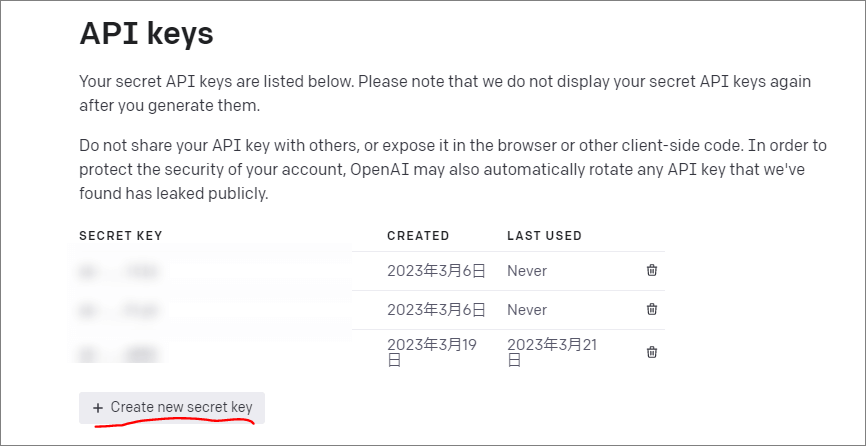
プロジェクトの.envファイルに OPENAI_API_KEY という項目でキーを設定します。

OPENAI_API_KEY=sk-××××

③ configを設定

次に、config/openai.phpを開きます。②で設定したキー情報を、configに設定しておきます。

<?php
return [
    'api_key' => env('OPENAI_API_KEY')
];

APIキーの設定は以上となります。

ChatGPT APIを使ってLaravelでWebアプリを作成:コード部分

次にコード部分を作っていきます。

① コントローラ作成

下記コマンドでコントローラを作ります。

php artisan make:controller ChatController

app/Http/Controllersの中のChatController.phpを開きます。

use宣言には、次の通りいれておきましょう。

【app/Http/Controllers/ChatContoller.php】

use OpenAI\Laravel\Facades\OpenAI;

メソッドは下記のように入れました。

【app/Http/Controllers/ChatContoller.php】

    public function chat(Request $request)
    {
        $inputText=$request->food;
        if($inputText!=null) {
            $responseText = $this->generateResponse($inputText);
        
            $messages = [
                ['title' => '食材', 'content' => $inputText],
                ['title' => 'レシピ', 'content' => $responseText]
            ];
            return view('chat.create', ['messages' => $messages]);
        
        }
        return view('chat.create');
    }

    public function generateResponse($inputText) {
        $result = OpenAI::completions()->create([
            'model' => 'gpt-3.5-turbo-instruct',
            'prompt' => '冷蔵庫にある食材を教えます。'.$inputText.'美味しいレシピを5文以内で教えてください。',
            'temperature' => 0.8,
            'max_tokens' => 150,
        ]);
        return $result['choices'][0]['text'];
    }

コードを解説します。

※なお、以前は ’model’ => ‘text-davinci-003′ でしたが、このモデルは古くなり使用できなくなったため、’gpt-3.5-turbo-instruct’ に変更しました。今後もまたモデルの変更はあるかもしれません。利用可能なモデルについては、下記をご参照ください。

chatメソッドのコードについて

chatメソッドは、ビュー部分表示のためのコードをいれています。上から説明します。

  • if($inputText!=null) とif構文を使っています。$inputTextは、フォームを通じて送信された食材($request->food) の情報が入っています。もし($inputText) がnullでなければ、つまり食材が送信されていれば、if構文の中のコードを実行する形にしています。
  • if構文の中では、$this->generateResponse($inputText); と、generateResponseメソッドに処理を受け渡しています。generateResponseでは、ChatGPT側に食材情報を受け渡し、得られた回答を$responseText という変数で返します。
  • $messagesの中に食材情報($inputText)と、ChatGPTの回答($responseText)をセットして、ビュー側に受け渡しています。

generateResponseメソッドのコードについて

generateResponseメソッド部分は、ChatGPTとやりとりしている部分になります。ざっと項目を説明します。

  • modelは、使用した機械学習モデルです。今回は「text-davinci-003」と設定しました。ライブラリの使用例に記載されていたので、こちらを使っています。どのモデルを使用するかで結果が変わります。
  • promptは、モデルに入力されるテキストとなります。ChatGPT側に受け渡す文章です。今回は、「’冷蔵庫にある食材を教えます’.$inputText.’美味しいレシピを5文以内で教えてください。」としました。このようにすることで、レシピを教えてくれるように、指示を送ることができます。また「5文以内」とすることで、回答の文量にも制限をかけました。
  • temperatureは、多様性を制御するためのパラメータとなります。高い(例:0.8)と、ランダムで多様性に富んでいる回答が得られ、低い(例:0.2)と、より保守的な回答が得られます。
  • max_tokensは、最大トークンとなります。今回は150までとしました。150トークンは大体150文字程度ですが、漢字が入ったりすると変わります。

こういった設定でChatGPTから回答を得て、これを返しています。

ただこの設定って、文字で言われても良く分からない部分ばかりですよね^^;

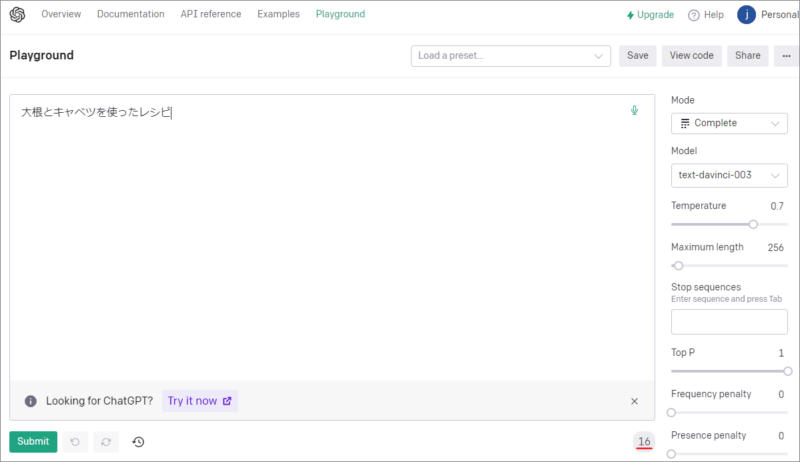
「設定を変えると、どんなふうに返答が変わるか見たい」という場合は、openAIのPlaygroundページでテストができます。

モデルや、Temperature等の各種設定を変えると、APIの応答がどう変わるかチェックできます。右下にトークン数も表示されます(下記では16となっています)。
② ルート設定

次にルート設定を作ります。

今回は、下記のように2つのルート設定をroutes/web.phpに加えました。

【routes/web.php】

use App\Http\Controllers\ChatController;

Route::get('/chat', [ChatController::class, 'chat'])->name('chat.create');
Route::post('/chat', [ChatController::class, 'chat'])->name('chat.post');

③ ビュー部分

最後にビュー部分です。

resources/viewsにchatフォルダを作り、その中にcreate.blade.phpファイルを作ります。下記のようにコードを入れます(クラス等、デザイン部分を構成するコードは省略しています)。

【resources/views/chat/create.blade.php】

<!DOCTYPE html>
<html lang="ja">
<head>
    <title>レシピ作成アプリ</title>
    @vite(['resources/css/app.css', 'resources/js/app.js'])
</head>
<body>
    <div>
        {{-- 材料を入力するためのフォーム --}}
        <form action="{{route('chat.post')}}" method="POST">
            @csrf
            <input name="food" type="text">
            <div>
            <button type="submit" style="padding:0.4em;background-color:green;color:white;">
                送信する
            </button>
            <button id="clearChatButton" style="padding:0.4em;background-color:red;color:white;">
                履歴削除
            </button>
        </div>
        </form>
            {{--ChatGPTの回答を表示 --}}
            @isset($messages)
            <div id="chat-contents">
                @foreach($messages as $message)
                    <div>
                       {{ $message['title'] }}: {{ $message['content'] }}
                    </div>
                @endforeach
            </div>
            @endisset
        </div>
    </div>
    {{-- 履歴削除ボタンをクリックすると、ChatGPTの回答(chat-contents内)を削除するスクリプト --}}
    <script>
        document.getElementById('clearChatButton').addEventListener('click', function() {
            const chatContainer = document.getElementById('chat-contents');
            chatContainer.innerHTML = '';
        });
    </script>
</body>
</html>

以上で、Webアプリの出来上がりです♪

【完成したWebアプリ】

微妙な材料でも、何とかちゃんとレシピを作ってくれます。

美味しいかどうかは、未検証ですが^^;

④ お役立ちサイト

ChatGPTとの連携コードを書く上で役立つサイトを2つご紹介します。

ひとつ目は、ChatGPTのAPI関連のマニュアルです。

ふたつ目は、今回使用した openai-php ライブラリのページです。

ChatGPTのAPIを使う時の料金について

ChatGPTのAPIの利用料金は、使用するモデルによって異なります。今回は、Davinciモデルを使いました。料金表は、下記ページにあります。

英語であれば1ワード1トークンですが、日本語の場合には、文字によってトークン数が異なります。漢字の場合には、トークンが多く使われます。

トークン数を調べたい場合には、先ほどもご紹介したPlaygroundで文字を入れてみてください。たとえば「大根とキャベツを使ったレシピ」で16トークンが消費されます。

また質問をした時と、返答された時の文字が両方ともカウントされます。

なかなか計算方法が複雑です。

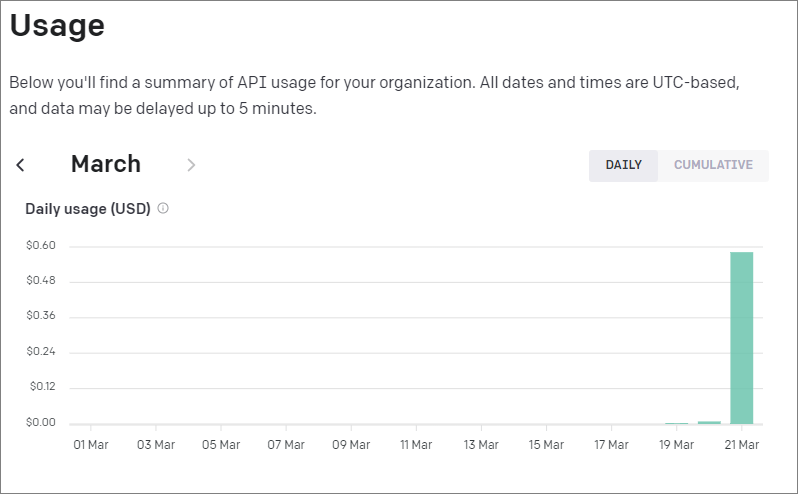
デフォルトで体験版として18ドル分が使えるので、テストしつつ、使用されるトークン数を確認できます。

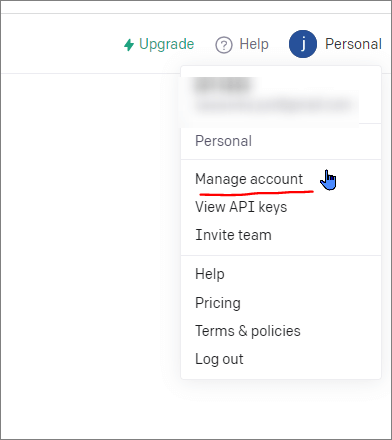
現在使っているトークン数は、ログイン後、右上のユーザー名をクリックして【Manage account】を選択すると分かります。
【API利用量を示したグラフ】
もしトークンを使いすぎるのを避けたい場合には、今回行ったように、max_tokensで返答文字数に制限をかけたり、「5文以内で教えて」などと指示をいれておく方法が使えます。

ユーザーが入力する部分に制限をかけておく手もあります。

なお有料版にした場合は、BillingメニューのUsage limitsで利用量の制限をかけられます。「うっかり使いすぎて、大変な金額になってしまった」という事態は避けられます。

さいごに

今回は、レシピ作成アプリの開発を通じて、ChatGPTとLaravelの連携方法をお伝えしました。

料金体系についても、お伝えしました。正直料金の計算方法はメンドウですが、想定外の支払いを回避する手がありますし、とりあえずは無料で使えます。

気になったら試してみてくださいね。

今回はざっくりとした形でWebアプリを作りましたが、まだまだ改良の余地ありです。また色々試してみたいと思います♪

なお、「まずはLaravelの基本コードを書けるようになりたい」と思ったら、学習サイト【Laravelの教科書】をご活用ください。

わたしが運営しているLaravel学習サイトになりますが、Laravelの使い方を学びつつ、フォーラムサイトを作る実践的な内容です。

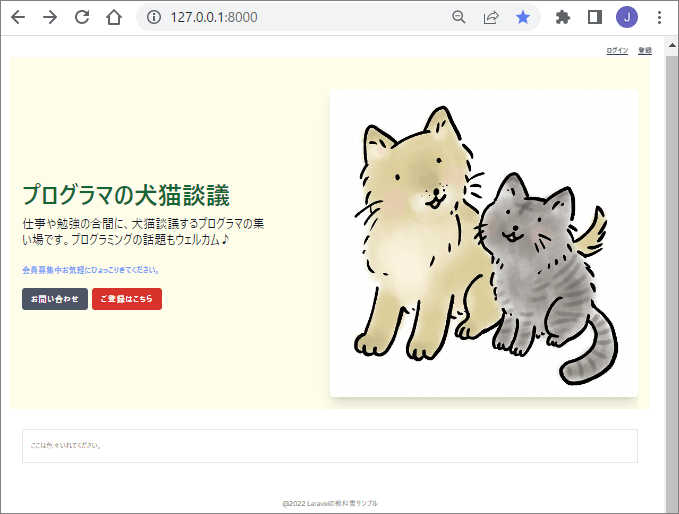
【Laravelの教科書を通じて作成するWebアプリ例】
基礎編は、無料です。

詳細は、こちらのご案内ページご覧ください。
Laravelの教科書について詳しく知る


ChatGPT

生成AIを「安全に」使うための研修・セミナー

お問い合わせ

生成AIの業務活用で気になるのは、効率だけでなくセキュリティです。 実践的な活用に加え、セキュリティ対策もお伝えします。

詳細を見てみる
 

生成AIを「安全に」使うための研修・セミナー

お問い合わせ

生成AIの業務活用で気になるのは、効率だけでなくセキュリティです。 実践的な活用に加え、セキュリティ対策もお伝えします。

詳細を見てみる

【Laravelの教科書・プレゼント】

Junko
Laravelの使い方を覚えたい!と思ったら、ぜひ、役立ててほしいです。 基礎編は無料でプレゼント中です♪
ひつじプログラマ
会員制サイトをいちから作っていくよ。ボタンをクリックして詳細を見てね。
Laravelの教科書の詳細を見る

最新版Laravel13への対応に対応。Laravel8からの各バージョンのテキストもご覧になれます♪

【無料プレゼント】

「LaravelでWebアプリをいちから作れるようになりたい!」

そんなLaravel初心者のあなたへ【Laravelの教科書】基礎編プレゼント中! 会員制フォーラムサイトを学習しながら作れます。

詳細はこちらをクリック

最新のLaravel13に対応。Laravel8からの各バージョンのテキストもご覧になれます♪

Laravelの本を書きました。


ひつじが目印♪

Laravelの使い方を分かりやすく解説した本を書きました。 書店やAmazon等のオンラインショップにて販売中
最新版Laravel13対応用サポートガイド(PDF)あり

書籍の詳細を見てみる

Laravelの本書きました。


ひつじが目印♪
クリックするとamazonページへ。
最新版Laravel13対応用
サポートガイド(PDF)あり

書籍の詳細を見てみる
シェアする
Twitter始めました。

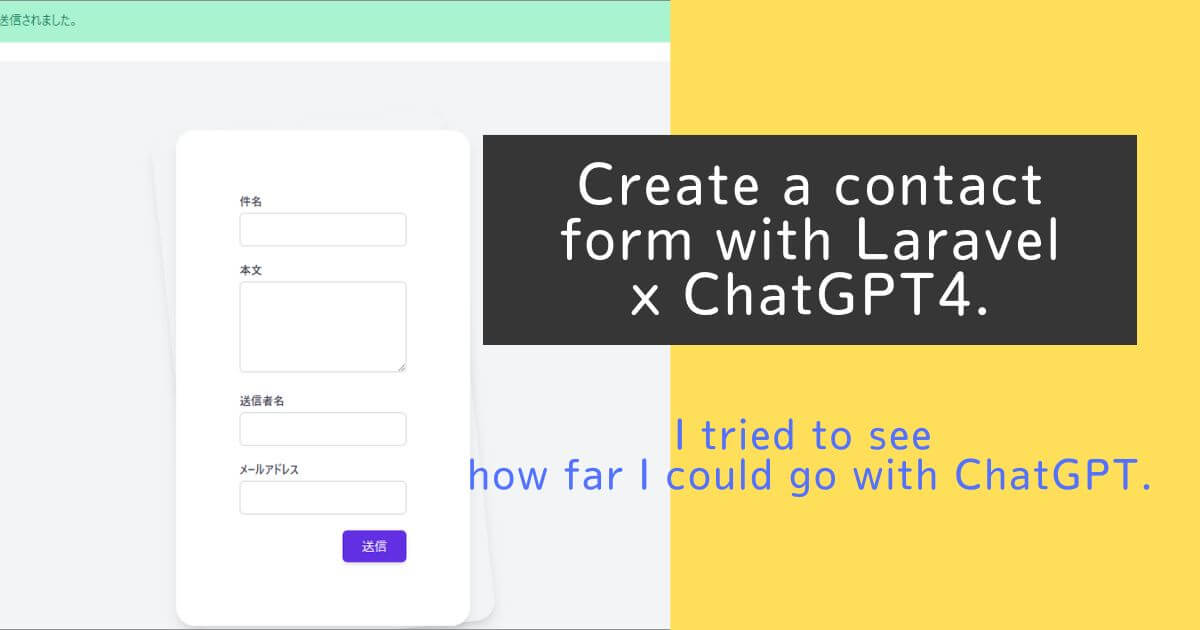
Using ChatGPT-4 to Create a Contact Form with Laravel

Laravel and AI

I experimented with ChatGPT4 to see if it would make development in Laravel easier.  I was able to create the above contact form, including design, in about 20 minutes.

My impression is “Amazing!”

I wrote what order I created it, what were the problems, and how AI can be used for programming.

Please see if you are interested in how the evolution of AI will affect your programming.

This article omits the actual code. Also, if you are interested in API integration between Laravel and ChatGPT, please see this article.

Assumptions for this project

The prerequisites are as follows

  • Using ChatGPT4, the latest version as of March 19, 2023
  • Using a project immediately after installing Laravel 10

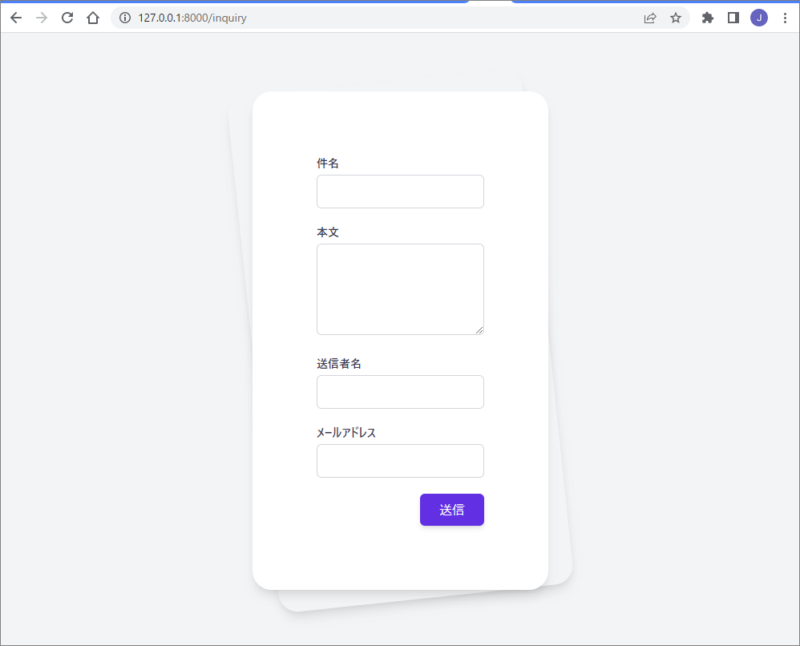
Completed contact form

The contact form created looks like this

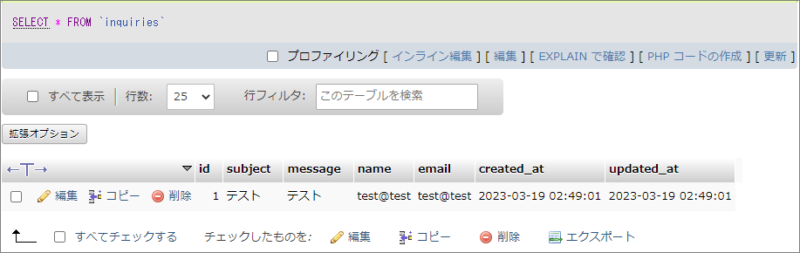
When submitted, the data is saved to the database.

Work flow

The following process was used to create the following flow.

①Create the HTML part of the contact form

I asked ChatGPT as below.

I want to create a contact form with the following conditions.

  • Use TailwindCSS
  • Responsive support
  • There are 4 input fields: subject, body, sender’s name, and e-mail address.

Please let me know the code.

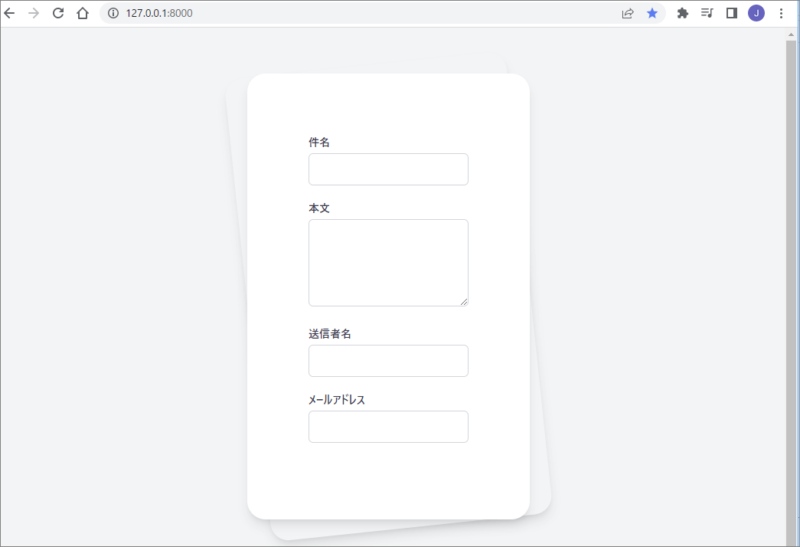
Then it gave me the code. I copied and pasted the code it gave me and got this form.

Hey, I feel like there is no submit button…. Well, let’s go ahead!

② Save code for contact form in Laravel

Then, I asked as below.

Using Laravel, please create code to save the data submitted by this contact form to the database.

Then, it teached me in turn how to write the model and migration creation commands, how to write in the migration file, how to create the route, and how to write the code in the controller.

The code it taught me was perfect.

As the rumors say, it was amazing…! I felt the power of ChatGPT.

③ Linking front-end and back-end back-end

However, the front end (HTML part) created in ① and the back end part are not linked.

First of all, ① did not have a submit button. So, I asked about this point.

You mean to copy-paste the code you just wrote into the create.blade.php file. But there is no submit button in the code. Please add a button as well.

Then it changed the code to work with the backend immediately. What surprised me here is that even with the vague way of writing “the code you just mentioned,” it understood which code I was referring to.

The front end (HTML part) was completed by inserting the code as it told us.

④ Testing and error resolution

Now that the code is ready, we test it. Unfortunately, however, it did not save properly.

Actually, I knew the cause of the problem, but I dared to send the error message to ChatGPT without fixing it.

“Add [subject] to fillable property to allow mass assignment on [App\Models\Inquiry]” I got this message.

Then it said, “This error message indicates that you do not allow mass assignment in the Inquiry model; you must set the $fillable property in the Inquiry model to allow mass assignment.”

It told me the proper error resolution. I modified the code as instructed, and the error was resolved.

⑤ Test performed and succeeded

Now that the error was fixed, I tried again to send data from the inquiry form. Then, the data was saved in the database.

A message was displayed on the form.

It took only about 20 minutes to create the contact form, including designing.

Problems with ChatGPT4

This time, the process went almost smoothly, but there were some problems.

Here are some of them.

Sometimes answers are cut off in the middle or error

I had an error twice with the message “Something went wrong”.

This problem was resolved when I clicked on the [Regenerate response] button.

There were also a couple of times when the answers were too long or were cut off in the middle. When I put in “tell me the rest of the story,” it told me.

The code that tells me has an abbreviated section

I copied and pasted the entire code that ChatGPT taught me to use this time. However, there were some omissions in the buttons and other parts of the code.

In such cases, you can ask, for example, “Tell me the code for the button part,” and they will tell you the code. Also, if an error occurs, you can send the error message and they will tell you how to fix it.

However, if I had not understood what was needed myself, I would not have been able to ask the right questions. In that case, I would not have been able to code as smoothly as I did.

Also, if it is an error with no error message, it may take longer to resolve.

Finally

This time, I created a contact form in Laravel using ChatGPT4 from scratch.

It took me less than 20 minutes to create something nice.

However, there are some omissions in the code it teach you. Also, this time I put together a code that can be created with a simple request, but if it is complicated, it may not understand our intention or it may teach us the wrong code.

In these cases, if you don’t have some knowledge of Laravel, it will be difficult to fix it.

Therefore, I felt that ChatGPT was suitable for supplementary use by those who can already code on their own. For now.

If you are in the learning stage, showing error messages and code and asking how to fix errors, seems like a good way to use it. It’s like having a teacher nearby who is easy to ask questions.

I would like to try using ChatGPT again and experiment with it in various ways.

Laravel and AI

生成AIを「安全に」使うための研修・セミナー

お問い合わせ

生成AIの業務活用で気になるのは、効率だけでなくセキュリティです。 実践的な活用に加え、セキュリティ対策もお伝えします。

詳細を見てみる
 

生成AIを「安全に」使うための研修・セミナー

お問い合わせ

生成AIの業務活用で気になるのは、効率だけでなくセキュリティです。 実践的な活用に加え、セキュリティ対策もお伝えします。

詳細を見てみる

【Laravelの教科書・プレゼント】

Junko
Laravelの使い方を覚えたい!と思ったら、ぜひ、役立ててほしいです。 基礎編は無料でプレゼント中です♪
ひつじプログラマ
会員制サイトをいちから作っていくよ。ボタンをクリックして詳細を見てね。
Laravelの教科書の詳細を見る

最新版Laravel13への対応に対応。Laravel8からの各バージョンのテキストもご覧になれます♪

【無料プレゼント】

「LaravelでWebアプリをいちから作れるようになりたい!」

そんなLaravel初心者のあなたへ【Laravelの教科書】基礎編プレゼント中! 会員制フォーラムサイトを学習しながら作れます。

詳細はこちらをクリック

最新のLaravel13に対応。Laravel8からの各バージョンのテキストもご覧になれます♪

Laravelの本を書きました。


ひつじが目印♪

Laravelの使い方を分かりやすく解説した本を書きました。 書店やAmazon等のオンラインショップにて販売中
最新版Laravel13対応用サポートガイド(PDF)あり

書籍の詳細を見てみる

Laravelの本書きました。


ひつじが目印♪
クリックするとamazonページへ。
最新版Laravel13対応用
サポートガイド(PDF)あり

書籍の詳細を見てみる
シェアする
Twitter始めました。

コメント

タイトルとURLをコピーしました